MySQL 8 is the latest version available for the installation. MySQL is a most popular database server for Linux systems, it also supports a large number of platforms. This tutorial will help you to Install MySQL Server 8.0 Community Edition on CentOS/RHEL 7/6, Fedora 30/29/28 using the package manager.
Step 1 – Setup Yum Repository
First, you need to enable MySQL yum repository in your system provided by MySQL. Execute one of below command as per your operating system version.
### On CentOS/RHEL 7 system ###
rpm -Uvh https://repo.mysql.com/mysql80-community-release-el7-3.noarch.rpm

### On CentOS/RHEL 6 system ###
rpm -Uvh https://repo.mysql.com/mysql80-community-release-el6-3.noarch.rpm

### On Fedora 30 system ###
rpm -Uvh https://repo.mysql.com/mysql80-community-release-fc30-1.noarch.rpm

### On Fedora 29 system ###
rpm -Uvh https://repo.mysql.com/mysql80-community-release-fc29-2.noarch.rpm

### On Fedora 28 system ###
rpm -Uvh https://repo.mysql.com/mysql80-community-release-fc28-2.noarch.rpm
Step 2 – Install MySQL Community Server
The MySQL yum repository contains multiple repositories configuration for multiple MySQL versions. So first disable all repositories in mysql repo file.
sed -i 's/enabled=1/enabled=0/' /etc/yum.repos.d/mysql-community.repo
Then execute one of the followings commands as per your operating system to install MySQL.
yum --enablerepo=mysql80-community install mysql-community-server  ## CentOS & RedHat
dnf --enablerepo=mysql80-community install mysql-community-server  ## Fedora Systems
Step 3 – Start MySQL Service
Start the MySQL server using the following command from Linux terminal.
Using SysVinit
service mysqld start
Using Systemd
systemctl start mysqld.service
Step 4 – Find default root Password
With the installation of MySQL 8.0, a temporary password is created for the MySQL root user. You can find the temporary password generated in log files.
grep "A temporary password" /var/log/mysqld.log
Output:
[Note] A temporary password is generated for root@localhost: hosygMikj1+t636
Step 5 – MySQL Post Install Setup
After installing MySQL first time, execute mysql_secure_installation command to secure MySQL server. It will prompt for few question’s, we recommended to say yes ( y ) for each.
mysql_secure_installation
Enter password for user root:

The existing password for the user account root has expired. Please set a new password.

New password:
Re-enter new password:

Remove anonymous users? (Press y|Y for Yes, any other key for No) : y

Disallow root login remotely? (Press y|Y for Yes, any other key for No) : y

Remove test database and access to it? (Press y|Y for Yes, any other key for No) : y

Reload privilege tables now? (Press y|Y for Yes, any other key for No) : y
Step 6 – Restart and Enable MySQL Service
The MySQL installation has been successfully completed. Now restart the service and setup autostart on system bootup.
### Using SysVinit
service mysqld restart
chkconfig mysqld on

### Using Systemd
systemctl restart mysqld.service
systemctl enable mysqld.service
Step 7 – Working with MySQL
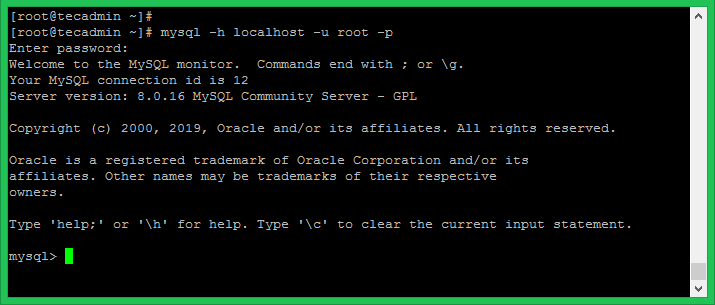
Now connect mysql database server Linux shell using below command. It will prompt for the password for authentication. On successful login, you will get the MySQL command prompt, where we can execute SQL queries.
mysql -h localhost -u root -p

After login, You can use following commands to create a new database, create a user and assign privileges to the user on the database. Change values as per your requirements.
|
1
2
3
4
5
6
7
8
9
10
11
|
### CREATE DATABASE
mysql> CREATE DATABASE mydb;
### CREATE USER ACCOUNT
mysql> CREATE USER ‘dbuser’@‘192.168.10.101’ IDENTIFIED BY ‘secret’;
### GRANT PERMISSIONS ON DATABASE
mysql> GRANT ALL ON mydb.* TO ‘dbuser’@‘192.168.10.101’;
### RELOAD PRIVILEGES
mysql> FLUSH PRIVILEGES;
|
Congratulation’s! you have successfully installed MySQL server on your system. Use below quick links for basic MySQL tasks.
REF:

